基于mikroC和microchip的TC74的温度测量方案

三、电路图
我在这里用的是芯片PIC18F2550,它可以与任何其他规模较小的PIC微控制器实现I2C通信。温度由TC74传感器读取并显示在LCD字符。别忘 了把两个上拉电阻(1K)连接在SDA和SCL线I2C总线上。在本实验中采用PIC18F2550单片机PIC板来自于StartUSB for PIC board.。
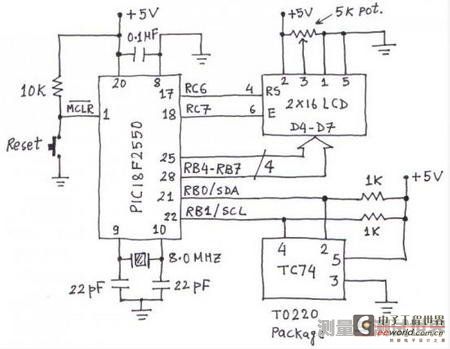
图4 电路图
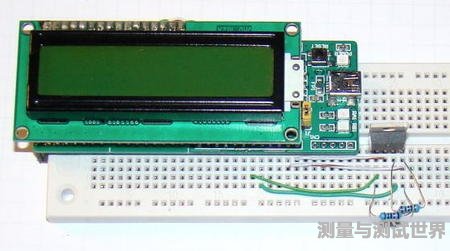
图5 实物图
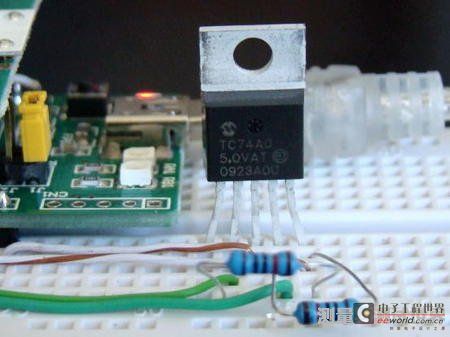
图6 TC74温度传感器
四、软件
PIC18F2550固件是在C使用MikroC Pro for PIC编译开发的。MikroC Pro for PIC编译器提供的内置支持I2C库。单片机读取TC74内部温度寄存器温度字并显示在LCD。下面的程序显示,TC74的整个工作范围内在40 至125°C。
程序:
/* Project: Using TC74 with PIC microcontroller
for temperature measurement
MCU: PIC18F2550 on-board StartUSB for PIC
Clock 48.0 MHz using HS + PLL
MCLR Enabled
*/
// Define LCD module connections.
sbit LCD_RS at RC6_bit;
sbit LCD_EN at RC7_bit;
sbit LCD_D4 at RB4_bit;
sbit LCD_D5 at RB5_bit;
sbit LCD_D6 at RB6_bit;
sbit LCD_D7 at RB7_bit;
sbit LCD_RS_Direction at TRISC6_bit;
sbit LCD_EN_Direction at TRISC7_bit;
sbit LCD_D4_Direction at TRISB4_bit;
sbit LCD_D5_Direction at TRISB5_bit;
sbit LCD_D6_Direction at TRISB6_bit;
sbit LCD_D7_Direction at TRISB7_bit;
// End LCD module connection definition
unsigned char Temp;
unsigned short num;
const int TC74A0 = 0x90;
void check_device(unsigned short dev_address){ I2C1_Start();
if (I2C1_Wr(dev_address)){ Lcd_Out(1,1,"Device not found");
}
else Lcd_Out(1,1,"TC74 device");
I2C1_Stop();
}
unsigned short Read_Temp(){
unsigned short result; I2C1_Start(); // Issue start signal
I2C1_Wr(TC74A0); // Address + Write bit
I2C1_Wr(0x00); // Read Temp
I2C1_Repeated_Start(); // Issue start signal
I2C1_Wr(TC74A0+1); // Address + Read bit
result = I2C1_Rd(0u); return result;
}

评论